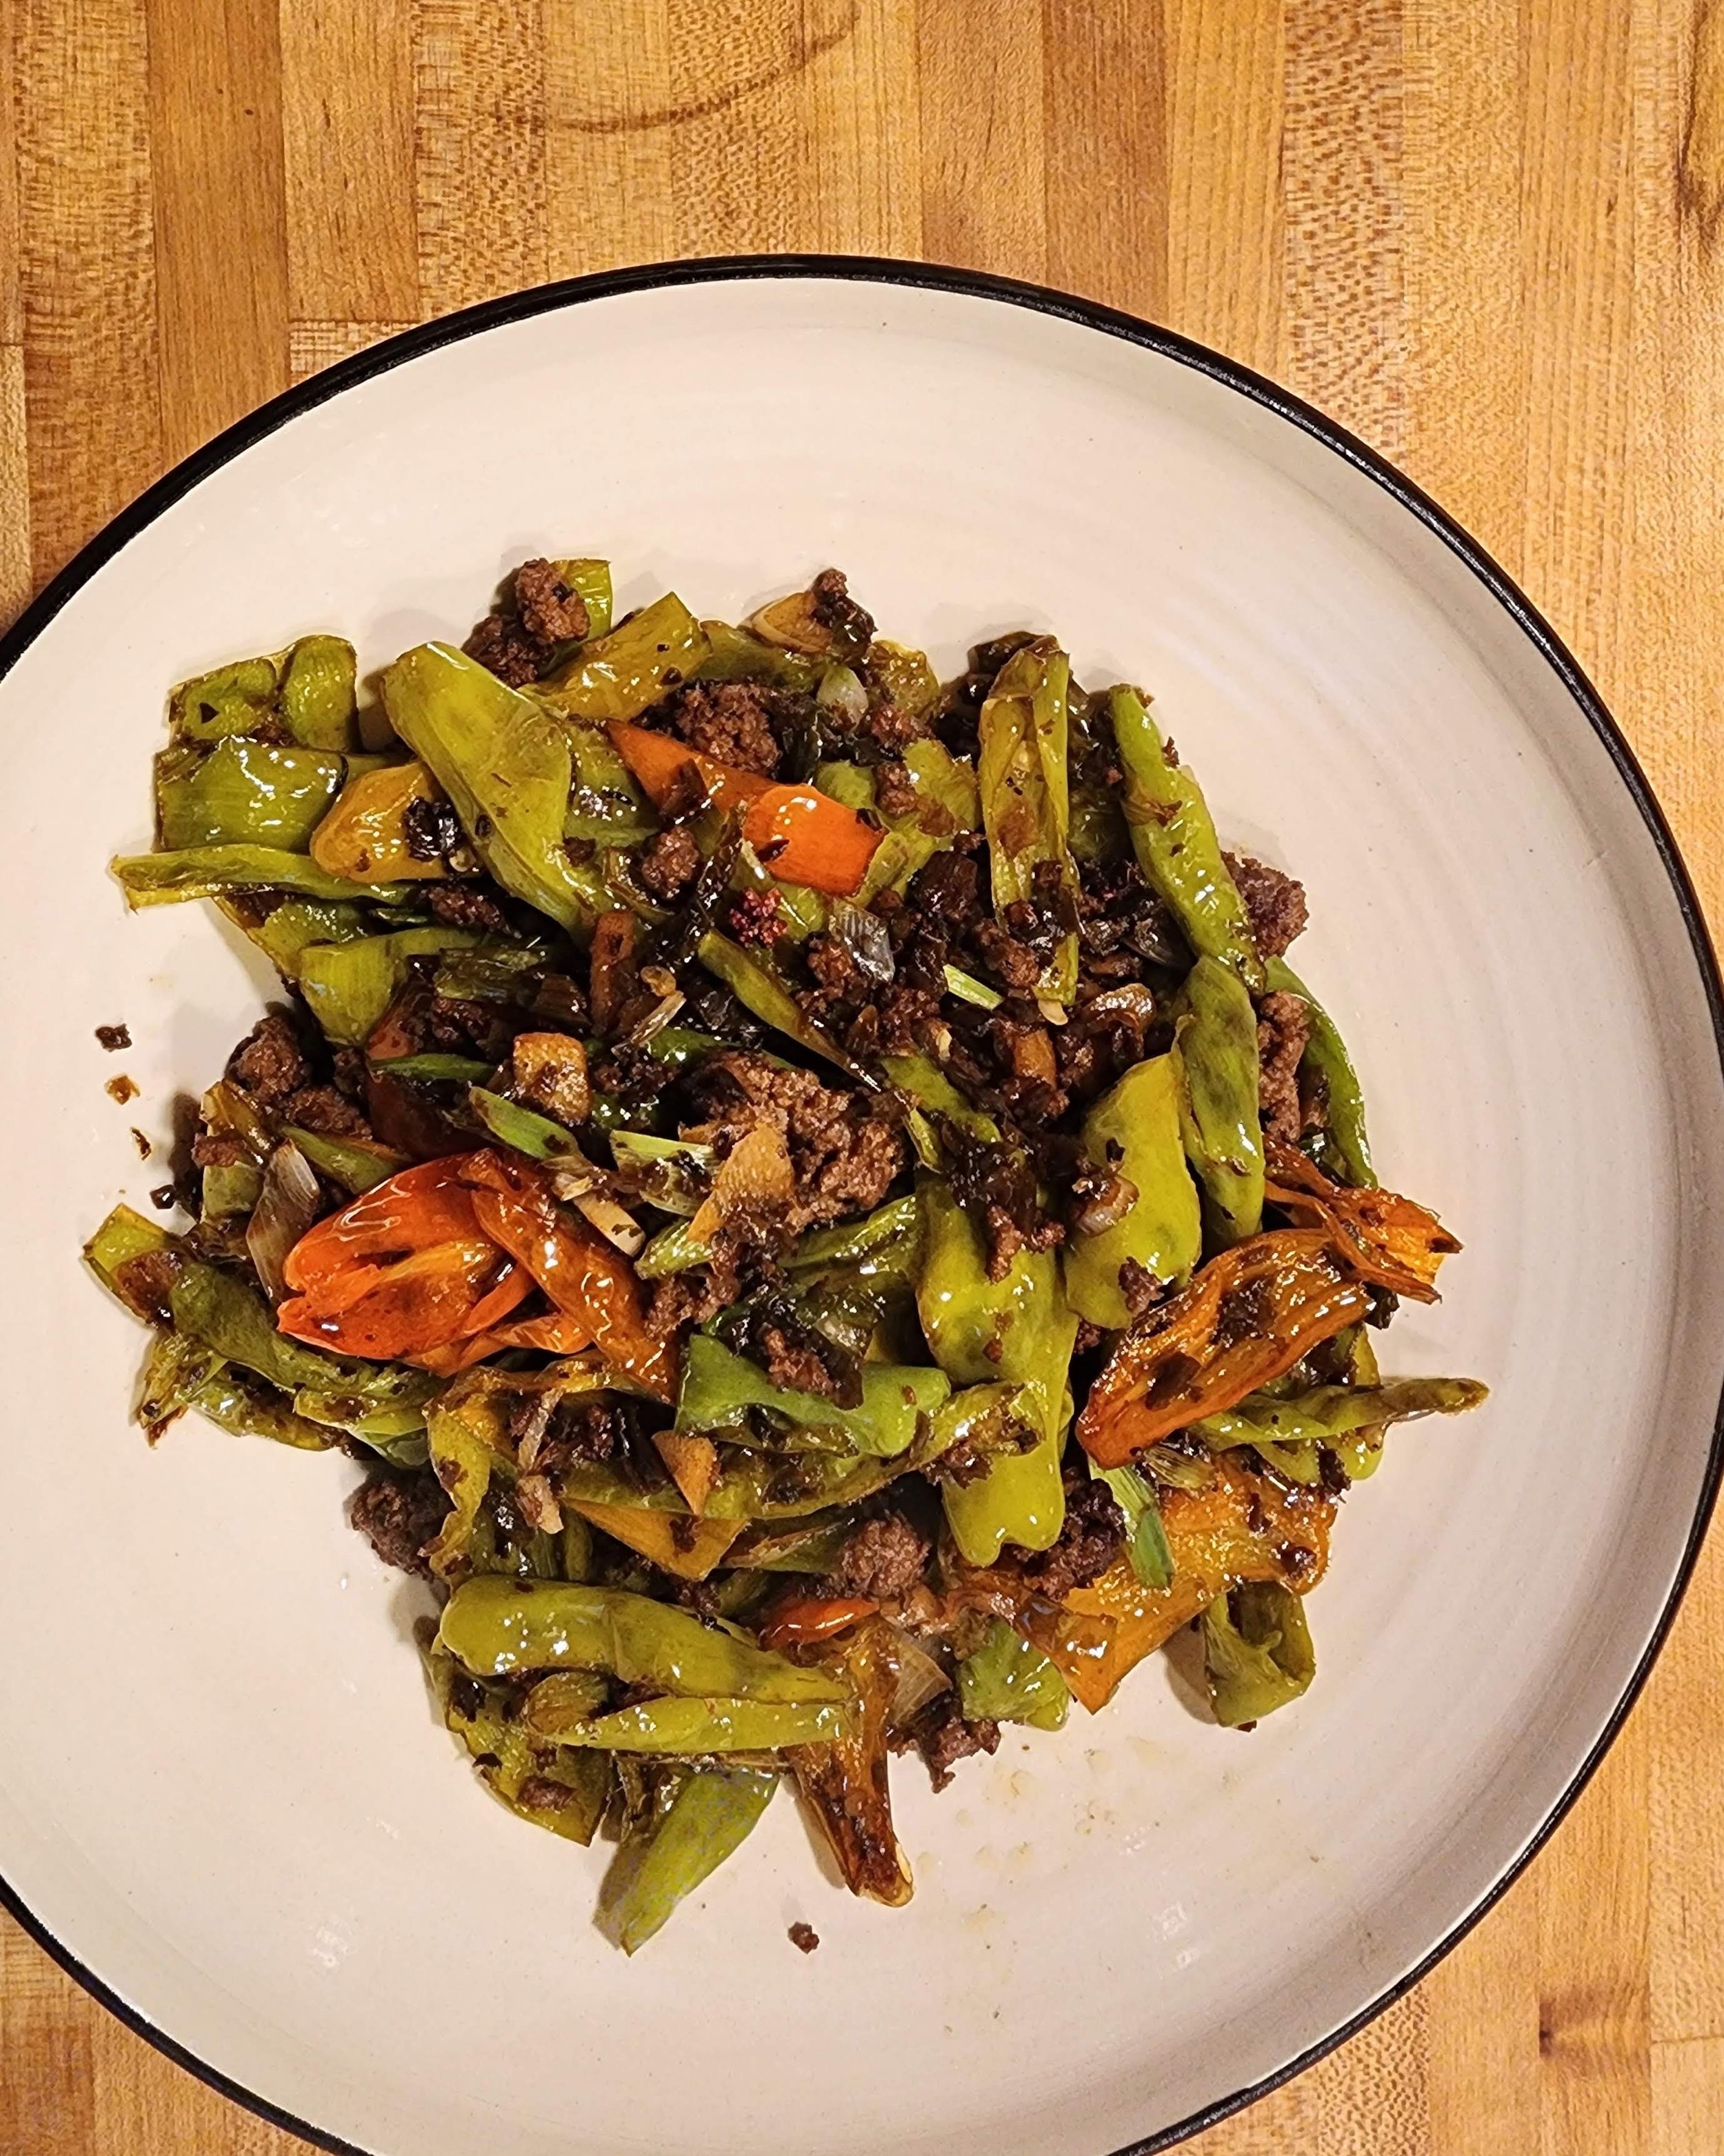
Dry-Fried Shishitos

As much as I love the simplicity of the thing I always tell people to do with Shishitos at the market – just pan fry in a wok or cast iron whole, until blistered, then add salt to taste – I must admit that after growing them for 10 years I’m ready for something new to do with them. This weekend I tried cooking them Sichuan style, modeled after Dry-Fried Green Beans from Fuchsia Dunlop, but bulked up a bit to make a simple Sunday night dinner all on its own, and I’d highly recommend! Serve with plenty of rice.

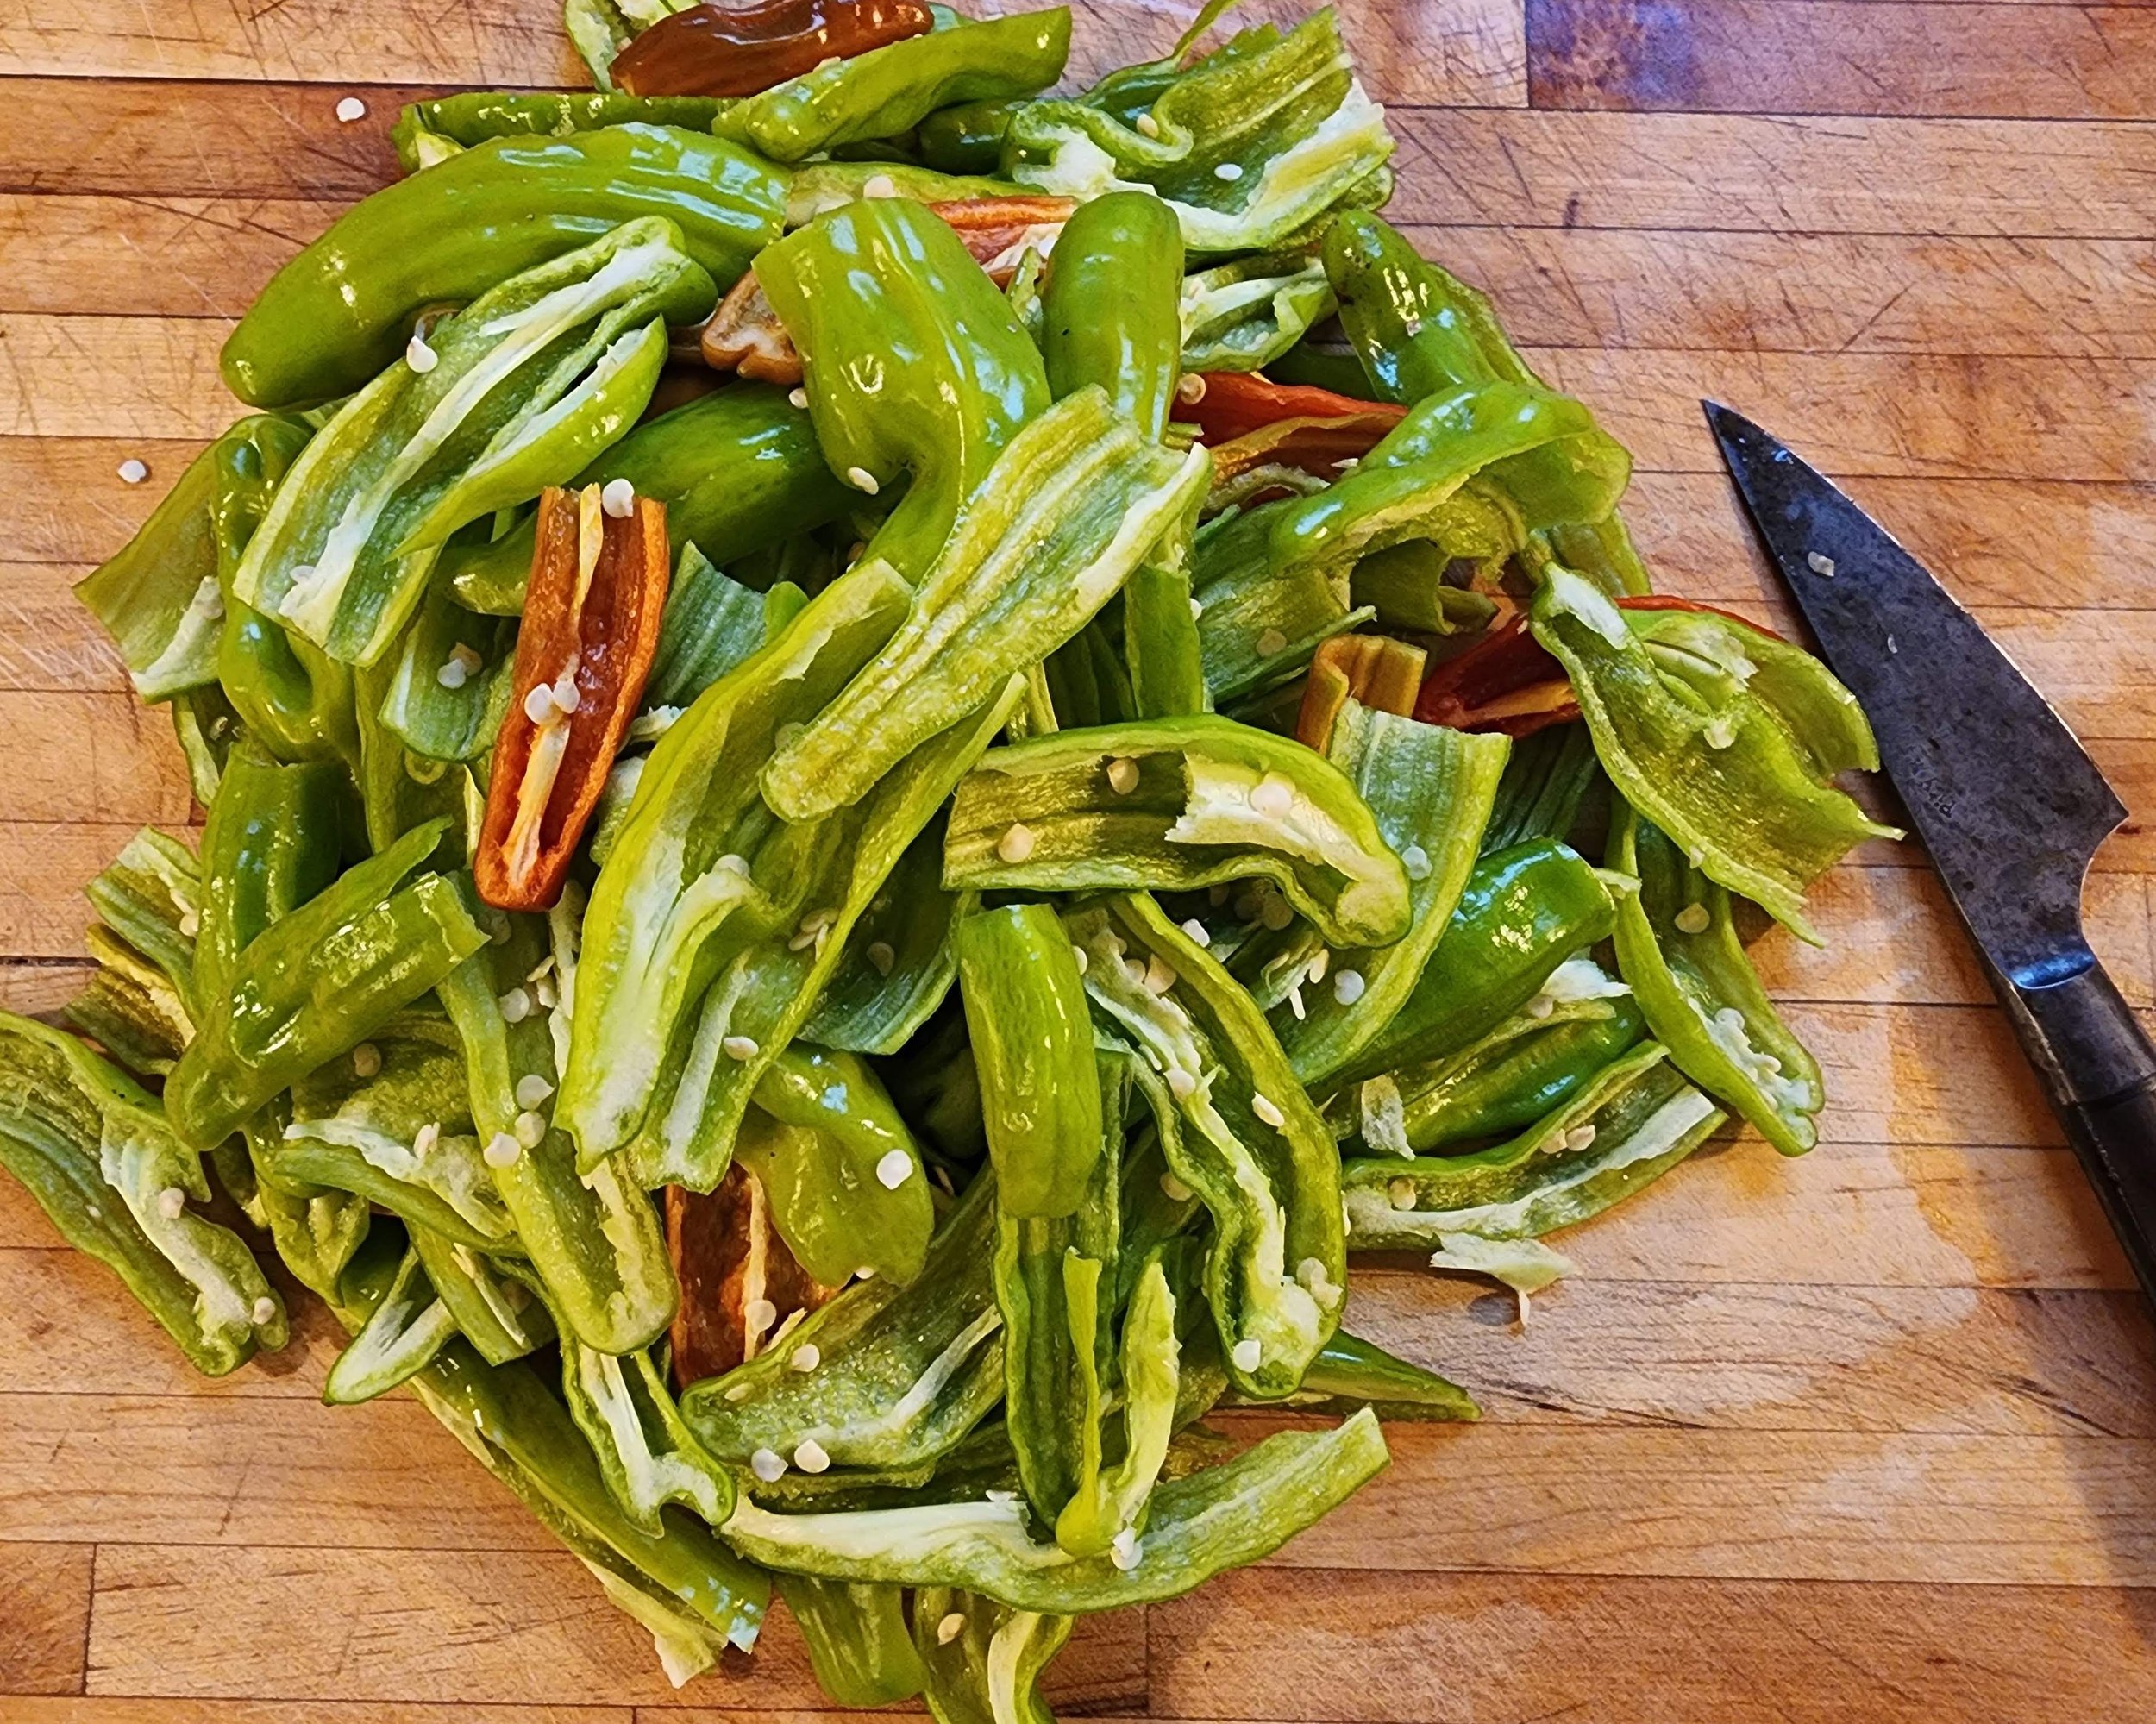
  1. Top three pints of shishitos and slice them in half long ways. Pull out seeds and center membranes from each half roughly (doesn’t have to be perfect).

  2. Heat 1.5-2 cups canola or peanut oil in a wok to 350 degrees (it’s ready when it sizzles violently around a test pepper) and deep fry peppers briefly in two or three batches until wrinkled. (You could skip the deep frying if you wanted, but it does make them good). Remove peppers with a slotted spoon and drain on paper towels. 

  3. Pour out most of the oil from the wok, leaving behind about 2 -3 tbsps, and return to high heat. Add ½ lb ground beef or pork (I used beef, but either would be good), breaking up into tiny bits. Splash in about 1 tbsp of Shaoxing wine as it cooks and stir fry until oil has cleared and meat is cooked through. Remove to a bowl with a slotted spoon, leaving behind 3-4 tbsp of oil in the bottom of the wok (if you need to pour some out or add some more to get this amount, do so). 

  4. Return the wok to high heat and add: 
    - 3-4 cloves garlic, sliced
    - 2 tbsp chopped ginger
    - Whites of 3-4 scallions, sliced 
    - ½-1 tsp whole sichuan pepper corns (optional)

  5. Stir fry until fragrant, then add back in the peppers and meat (if you didn’t pre-fry the peppers above, add them before the meat, cook on medium high heat until they are soft, then add back in the meat).

  6. Splash in 1-3 tsp light soy sauce, and ½ tsp dark soy sauce. Add ¼ cup Yibin yacai, if you have it, a Sichuan pickled and chopped mustard stem.

  7. Taste for salt and add more soy or salt if needed. Drizzle over 1 tsp sesame oil off heat. 

Ginger Beer

When the weather turns cold it’s time to pull the last of the season’s ginger, and that also means it’s time to make ginger beer! This is a fun and relatively fool-proof recipe from the essential book Wild Fermentation by the guru of ferments, Sandor Katz.

ginger bug.jpg

Ginger Beer
From Wild Fermentation by Sandor Katz

This Caribbean-style soft drink uses a “ginger bug” to start the fermentation. The ginger bug is simply water, sugar, and grated ginger, which starts actively fermenting within a couple of days. This ginger beer is a soft drink, fermented just enough to create carbonation but not enough to contribute any appreciable level of alcohol. If the ginger is mild, kids love it.

TIMEFRAME: 2 to 3 weeks

INGREDIENTS (for 1 gallon):
3 inches or more fresh ginger root
2 cups sugar
2 lemons
Water

PROCESS:

Start the “ginger bug”: Add 2 teaspoons grated ginger (skin and all) and 2 teaspoons sugar to 1 cup of water. Stir well and leave in a warm spot, covered with cheesecloth to allow free circulation of air while keeping flies out. Add this amount of ginger and sugar every day or two and stir, until the bug starts bubbling, in about 2 days to about a week.

Make the ginger beer any time after the bug becomes active. (If you wait more then a couple of days, keep feeding the bug fresh ginger and sugar every 2 days.) Boil 2 quarts of water. Add about 2 inches of ginger, grated, for a mild ginger flavor (up to 6 inches for an intense ginger flavor) and 1.5 cups sugar. Boil this mixture for about 15 minutes. Cool.

Once the ginger-sugar-water mixture has cooled, strain the ginger out and add the juice of the lemons and the strained ginger bug. (If you intend to make this process and ongoing rhythm, reserve a few tablespoons of the active bug as a starter and replenish it with additional water, grated ginger, and sugar.) Add enough water to make 1 gallon.

Bottle in sealable bottles: recycle plastic soda bottles with screw tops; rubber gasket “bail-top” bottles that Grolsch and some other premium beers use; sealable juice jugs; or capped beer bottles. Leave bottles to ferment in a warm spot for about 2 weeks.

Cool before opening. When you open ginger beer, be prepared with a glass, since carbonation can be strong and force liquid rushing out of the bottle.

Candied Ginger

A perfect way to savor the last of the fall harvest, and a great holiday gift! If you're feeling fancy, dip the end of each piece into melted chocolate.

IMG_1277.JPG

Adapted from David Lebovitz:

1 pound (500g) fresh ginger, peeled
4 cups (800g) sugar, plus additional sugar for coating the ginger slices, if desired
4 cups (1L) water
pinch of salt

1. Slice the ginger as thinly as possible. It can’t be too thin, so use a sharp knife or a mandolin (don't cut yourself!).

2. Put the ginger slices in a nonreactive pot, add enough water to cover the ginger, and bring to a boil. Reduce heat and let ginger simmer for ten minutes. Drain, and repeat, simmering the ginger slices one more time.

3. Mix the sugar and 4 cups (1l) water in the pot, along with a pinch of salt and the ginger slices, and cook until the temperature reaches 225F (106C.)

4. Remove from heat and let stand for at least an hour, or as long as overnight. Or if you want to coat the slices with sugar, drain very well while the ginger is hot, so the syrup will drain away better.

5. Store ginger slices in its syrup, or toss the drained slices in granulated sugar. Shake off excess sugar, and spread the ginger slices on a cooling rack overnight, until they’re somewhat dry. The sugar can be reused in a batter or ice cream base, or for another purpose. (FRF note: We had to let our slices dry flat on a baking sheet for three days before they had the right dried texture, then coated them in more sugar. If you coat them in sugar before they are dried they will just continue to absorb the sugar without getting the wonderful crystalized texture, so don't be afraid to wait a few days until they are nice and dried!)

Storage: The ginger, packed in its syrup, can be stored in the refrigerator for up to one year. If you’re concerned with it crystallizing, add a tablespoon or two of corn syrup or glucose to the sugar syrup at the beginning of step #3. If tossed in sugar, the pieces can be stored at room temperature for a few months.

Celtuce salad with spring onion oil

In our ongoing quest to always be finding new unique and delicious things to grow, this week we are delighted to introduce... CELTUCE!

Celtuce.jpg

Celtuce is a Chinese variety of lettuce grown not for the leaves but instead for the tender and crispy stem. Peal off the tougher outer layer to reveal the beautiful pale green stalk, which has a strikingly unique, nutty flavor, and can be eaten raw in salads or cooked in stir-fries or soups.

The following is a recipe for a simple salad of celtuce from my favorite Chinese cookbook, Land of Fish and Rice, by Fuchsia Dunlop.

Celtuce Salad with Spring Onion Oil
From Land of Fish and Rice by Fuchsia Dunlop

2 celtuce stems (about 1.5 lbs)
4 tbsp thinly sliced spring onions, green parts only
2 tbsp cooking oil
1 tsp superfine sugar
salt

Use a potato peeler to remove the fibrous outer layer of the celtuce stems. Slice the stems thinly, then cut the slices into slivers. Put the slivers in a bowl, add 1 tsp salt and mix thoroughly. Set them aside in a colander for half an hour or so.

Drain off any water that has emerged from the celtuce and squeeze the strips tightly to get rid of as much liquid as possible. Put the spring onions in a small heatproof bowl.

Heat the oil in a seasoned wok until the edges of the wok are beginning to smoke. Pour the hot oil over the spring onions; it should sizzle fiercely. Pour the spring onions and oil onto the celtuce, add the sugar and extra salt to taste and mix well. Pile up on a dish to serve.

Chinese Sweet and Sour Radishes

Radishes are a great crop. They're relatively easy, they're one of the fastest growing things on the farm, they look great at the stand, and they elicit a delightful enthusiasm from some of our customers. Until I found this recipe, however, I was always a little lukewarm on eating them. No longer. I could eat these all day. They take a little planning, with the two hour salting period, but it's totally worth it.

Sweet and Sour Radishes
From the wonderful Land of Fish and Rice by Fuchsia Dunlop

2 bunches radishes
2 tsp salt
3 tbsp superfine sugar (or regular is fine)
1.5 tbsp Chinese brown rice vinegar
3/4 tsp sesame oil

Top and tail the radishes. Fold them up in a clean tea towel and pat them into a single layer underneath the cloth. Smack them with the flat side of a cleaver or rolling pin to crack them all open, without smashing them to smithereens. Put the radishes in a bowl, add the salt, and mix well. Set aside for at least two hours.

Rinse the radishes, then squeeze out as much water as possible, either by pressing them in a colander or wrapping them in a clean tea towel and squeezing it out. Put the radishes in a bowl, add the sugar and mix well. Set aside for a few minutes to allow the sugar to dissolve, then stir in the vinegar. Just before serving, stir in the sesame oil.

For an extra visual pop, garnish with slivered chives, black sesame seeds, or whatever else you can think of!

For an extra visual pop, garnish with slivered chives, black sesame seeds, or whatever else you can think of!

Stir-fried Okra

I learned to love okra from this recipe, in large part because of an important tidbit that I learned from Julie Sahni’s introduction to the recipe. “Sliminess results when cut okra comes in contact with water,” she writes. In order to avoid sliminess, “Always remember two things when cooking okra:  Dry the washed okra thoroughly before cutting it. Salt it only after it is fully cooked, as salt will cause the okra to sweat.”

Stir-fried Okra
(Bhindi Sabzi)
From Classic Indian Cooking by Julie Sahni

1 pound fresh okra
2 green chilies (optional)
3 tablespoons light vegetable oil
½ teaspoon Kosher salt

1. Wash the okra under running cold water, and wipe dry with kitchen towels. Trim both ends, and slice the okra into ¼-inch-thick rounds. Slit and seed the chilies, and slice them also into ¼-inch-thick rounds. 

2. Heat the oil over high heat in a large frying pan. When it is very hot, add the okra and chilis. Spread them into an even layer. Let the okra sizzle undisturbed for a minute, then reduce heat to medium. Cook the okra, uncovered, for 20 minutes, stirring frequently to ensure even cooking. Increase heat to high, and now, fry the okra, stirring rapidly, for 5 minutes, or until it is lightly browned (the browning will be uneven). Turn off heat, sprinkle with salt, and toss the fried okra well to coat all pieces evenly. 

Rice & Veggie Bowls with Thai Coconut Lime Dressing

Here's something I don't take pictures of: cooked food.

I take many, many photos of our raw produce (haha, funny joke, everyone knows I only take baby and flowers photos now), but I don't ever photograph prepared meals. I feel that without professional lighting and staging it is basically impossible to make cooked food look appetizing in photographs, and ain't nobody got time for that in high summer. But, if I were ever going to photograph cooked food, it might have been this rice bowl. I guess you'll have to trust me that it was gorgeous and instead enjoy this photo of our carrots, which were featured prominently in said bowl.

This recipe meets one of my main criteria for summer eating in that in can be described by the following three steps. Step one: make some kind of spicy sauce and some kind of rice. Step two: cut up whatever veggies were harvested that day. Step three: mix together in an obscenely large bowl and eat. 

Adapted from this recipe on Food 52 for two people, but you should probably double it - it makes great leftovers! 

For the Thai coconut-lime dressing:
Juice of 1 lime (about 1/4 cup)
2 1/2 tablespoons fish sauce
1/3 cup full-fat coconut milk
1 tablespoon light brown sugar
Zest of 1 lime (about 1 to 2 tablespoons)
2 tablespoons fresh lemongrass, finely chopped
1/2 serrano pepper, seeded and minced (I used a japapeno!)
1 garlic clove, minced
2 tablespoons finely chopped fresh cilantro
1 tablespoon finely chopped fresh mint

For the salad bowl and toppings:
1 1/2 cups cooked black or red rice
10 ounces poached chicken breast, shredded, if you want. Or tofu. Or nothing.
2 cucumbers
4 large radishes, thinly sliced
1 - 2 medium carrots, peeled and thinly sliced
4 hakurei turnips, thinly sliced
1 cup onion scapes or scallions, cut thinly on the bias
1/4 cup roughly chopped fresh cilantro
1/4 cup roughly chopped fresh mint

Fancy Potato Salad

Adapted from Heidi Swanson, this recipe deliciously combines so much of what midsummer has to offer: new potatoes, chinese broccoli, shallots, parsley, tarragon, and scallions. We've never met a potato salad we don't like, but this recipe is particularly herby and summery, light and delicious. Make for endless picnics. 

1 1/2 lbs small new potatoes
1/2 cup + 2 tbsp olive oil
Salt
1 - 2 bunches chinese broccoli
4 large eggs, hardboiled
2 tbsp red wine vinegar
1 tsp mustard
1 tbsp capers
2 shallots, chopped
1 tbsp fresh parsley, chopped
1 tbsp fresh tarragon, chopped
1 tbsp fresh scallions or chives, chopped

Slice potatoes into pieces and toss with 1 tablespoon of olive oil, a pinch of salt, and roast on a baking sheet at 400 degrees for about half an hour, or until cooked through. Meanwhile, toss the broccoli with 1 tablespoon of olive oil, a pinch of salt, and roast at 400 degrees for the last 15 minutes that the potatoes are in the oven. 

Mash the yolk of one of the hard-boiled eggs in a medium bowl. Very slowly add the remaining 1/2 cup of olive oil, beating constantly. Whisk in the vinegar, then mustard, then stir in capers, shallots, herbs, and 1/4 teaspoon salt. 

Coarsely chop the remaining eggs and fold them into the dressing. Put the warm broccoli and potatoes in a large bowl and toss with dressing. 
 

Tempura Tuesdays!

Here at Four Root Farm we take dinner very seriously. Even if it means eating at 9:00 pm (or 9:30... or 9:45...) we all sit down together to eat a hearty meal almost every night, and those meals are almost always almost entirely veggies just pulled from the field. And we don't take any day more seriously than Tuesdays - affectionately known as Tempura Tuesdays!!

This time of year our weekly tempura adventures get more and more exciting as we have more crops to add to the pile, but really we will tempura almost anything that can be sliced and won't disintegrate in steaming hot oil. We recommend you take the same approach - the more creative the better, you won't be sorry. We harvested our very first summer squash on Tuesday specifically for tempura, and also included bok choi, hakurei turnips, carrots, broccoli raab florets, and squash blossoms. 

Here's what you do to make the tempura batter - the rest is up to you.

  1. Slice whatever veggies you're experimenting with into manageable bite-size pieces. If they're too small they'll fall apart and if they're too big they'll be hard to bite.
  2. Mix together:
    1 egg
    250 ml cold beer (PBR is our prefered lager)
    salt and pepper
    100 g flour
  3. Meanwhile, heat vegetable oil in a heavy saucepan that's deep enough to submerge the veggies you've prepared. You can test the temperature of the oil by dropping in a drip of batter - if it sinks to the bottom and then rises up, the oil is hot enough. 
  4. Once the oil is the right temperature, coat the veggies in the batter and deep fry them for 3 - 5 minutes, or until they're golden brown. 
  5. Eat SOON! Tempura is best when it's just cool enough to eat.


Hot Peppers

The hotter the pepper the slower it ripens, but all summer we've been watching the hottest of the hots quietly simmering and thinking about turning color. Capsaicin bombs have been barreling towards us for months as the plants slowly grew and flowered in full force.

Now, in this first week of September, when the evenings have already turned cool and crisp, they have arrived. Don't say we didn't warn you.

Southeast Asian Chili-Garlic Relish

I will be telling you to do many things with many hot peppers over the next few weeks (as it becomes full-on hot HOT pepper season) because I'm a bit of a freak about them. I've done countless experiments - some of which resulted in recipes that are still staples today, and some of which were potions that ended up too hot to even be in the same room with let alone eat. But still, trust me. I love hot peppers.

If you only do one thing with hot peppers all summer, I would have to say it should be this two-part recipe. Part one (tuong ot toi) is a simple relish that goes great on basically anything and can be made with any pepper, depending on how hot you like it. I most often make this with Hungarian Hot Wax peppers because they're on the milder side - and therefore this relish can eaten more like salsa. Just scoop it by the spoonful. But I've also made it with hotter peppers and it makes a great addition to any meal that needs a little kick.

Part two uses some of what you make in part one, and is a sweet dipping sauce that just begs for a homemade summer roll or grilled chicken.  

TUONG OT TOI

Makes one quart
As with many of my pickle and relish recipes, this one is adapted from Linda Ziedrich.

1 1/2 pounds ripe hot peppers
1 C cider vinegar
1 tbsp pickling salt
1 small garlic head, cloves separated and peeled

  1. Blend all ingredients together in a blender or food processor, being careful to not blend too much.
  2. Store in the fridge, where the relish will be spicy and fresh for up to a year.  

SWEET CHILI GARLIC SAUCE

1 C distilled vinegar
1 C water
2 C sugar
2 tsp pickling salt
1/4 C minced garlic
1/4 C tuong ot toi (from above)

  1. Bring the vinegar, water, sugar, salt, and garlic to a boil stirring to dissolve the sugar and salt. Reduce the heat and boil gently until the mixture thickens, about 30 minutes.
  2. Stir in the chili-garlic relish. Increase the heat and bring the sauce to a rolling boil for 2 minutes. Remove from heat and let it cool, then store in the fridge for at least a year.
     

Lebanese Pickled Eggplant Stuffed with Garlic

One of our best, best friends is an adventurous fermenter, pickle fanatic, and fellow farmer with a very refined palette - so when he told me that he'd been dreaming of these pickled eggplants since I made them last season, I took note. I loved slicing them up and putting them on sandwiches with hummus, or on a salad, or as an appetizer with olives, but Justin just ate them by the jar. They were gone before he even know what was happening, and then he longed for them all year. Coming from him, that's quite a compliment.

All year I promised him we would make a gigantic batch this season, and the time has come. Last weekend we gathered in the evening, at far too late an hour to be starting such a project, and went into production. We made 12 quarts, but may decide to make more this week, just in case, for stockpiling. We're assuming a "can't ever have too many" position, because they really are that good.

Maybe you're like us and have hundreds of pounds of eggplants in your walk-in, or maybe you just have a few long skinny ones left over in the fridge. Either way, make these pickles with the small, long, skinny asian varieties that we grow, and don't skimp on the garlic and cayenne. These should be spicy and very flavorful. They'll get you through winter that way.

These quantities are for one quart, so scale up accordingly:

1 - 1 1/2 pounds of small, long eggplants
1 garlic head, peeled and crushed
1 tablespoon pickling salt
1/2 teaspoon cayenne
1 cup plus 2 tablespoons red wine vinegar
1 cup plus 2 tablespoons water

1. Steam the eggplants for 5 to 8 minutes, or until they are tender but not mushy. 
2. Mix the crushed garlic with salt and cayenne. Slit each eggplant lengthwise, cutting most of the way through. Stuff the eggplants with the garlic mixture. Pack the eggplants into the jar.
3. Boil vinegar and water, then let cool. Fill the jar to the brim with the cooled liquid.
4. Store in the fridge for at least three weeks, but these pickles will stay good in the fridge for a few months at least.

Adapted from Linda Ziedrich's Joy of Pickling.


Sungold and Fairy Tale Pasta: A Simple Summer Delicacy

We’re getting to the juicy and delicious time of year when almost every meal is what we lovingly call “only olive oil” – meals in which the ONLY ingredient that didn’t come from the farm is the olive oil. This recipe is technically an “only olive oil and pasta” dinner, but someday soon we’ll be growing and milling our own flour for bread and pasta and this too will be only olive oil.

When the sungolds and fairy tales are both in season, we make this dish often. Very often. More than twice a week, let’s say, though I’m a little embarrassed to admit that. It’s just so quick, so simple, so seasonal and so delicious. It tastes like summer. The recipe definitely falls into the catch-all category of what we do with most veggies – saute with olive oil and garlic – but it’s worth a special mention because it’s just such a delicacy.

Here’s what you’ll need:

Pasta (angel hair would be nice, but any pasta will do)
¼ C olive oil
3 – 6 cloves garlic, peeled and coarsely chopped
2 pints of fairy tale eggplants, cut into quarters (you don’t want to chop the eggplant too small – nice big chunks makes it creamier)
1 pint of sungold cherry tomatoes, cut into halves
1 hot pepper of your choice, or more to taste, finely chopped with seeds removed
Basil, coarsely chopped
A little parmesan on top never hurts

Here’s what to do:

1.       Boil the pasta.
2.       Put ¼ C of olive oil in a large pan on medium heat, then add garlic.
3.       Saute garlic until it just starts to brown, stirring occasionally – about 3 minutes.
4.       Add the eggplants, and salt to taste. Saute for 5 to 8 minutes, or until the eggplants are browned and tender but before they start to fall apart. Stir occasionally.
5.       Add the tomatoes and peppers, saute for another five minutes.
6.       Turn off heat and add basil, stir.
7.       Serve over pasta.

Eggplants

It's officially eggplant season, and we really couldn't be happier here at the farm. We hold a special place in our collective heart for the creamy, tender, nutty flavors of this exceptional nightshade, and during prime eggplant season we are known to make ourselves sick eating it for three (or four, or five) meals a day.

In typical form, we're growing nine different varieties this season - each type has its own character and taste, so we'll try to be clear in our recipes about which types are best for which methods of preparation. Though, when in doubt, grill or broil any of these varieties using the recipe below.  

Grilled or Broiled Eggplant Slices
Adapted from How to Cook Everything by Mark Bittman 

1 medium-to-large italian eggplant (1 to 1½ pounds)
1 tsp minced garlic
4 to 6 tbsp olive oil
Salt and pepper to taste
Minced fresh parsley leaves

Cut the eggplant and salt, if you like. (This will draw out the bitterness: sprinkle both sides of the slices liberally with coarse salt, then let drain in a colander for at least half an hour, or up to two hours; rinse and squeeze dry between paper or cloth towels.) Start a charcoal or wood fire or preheat a gas grill or broiler; the rack should be 4 to 6 inches from the heat source. Stir the garlic into the olive oil and brush one side of the eggplant slices with the oil. Place, oiled side down, on a baking sheet or directly on the grill. Sprinkle with salt (if you salted the eggplant, hold off) and pepper, then brush with more oil. Broil or grill until browned on both sides, turning once or twice and brushing with more oil if the eggplant looks dry. Serve hot or at room temperature, garnished with parsley.

Turning Cucumbers into Pickles

There's really only one logical thing to do when the cucumbers suddenly start ripening 50 pounds of fruit a day... Start making pickles!

I dedicate a lot of time and energy over the course of the summer to putting up food for winter, which feels crazy when it's 11:30 pm on a Sunday in August and there are four different vats of simmering brines on the stove and juicy rotten tomatoes all over the dining room, but the curries and shakshukas and hot sauces that we feast on in the winter are reminder enough that it's worth it. All that mayhem is still to come this season though, so we fully enjoyed our first, relatively small, pickling adventure last night. We made 9 quarts of spicy pickles - and a pretty insubstantial mess, all things considered.  

I'm very good at taking over the entire kitchen and dining room (which are, in fairness to me, tiny) once I get going on a pickling or fermenting project. Especially when I have Elise's expert pickling (and mess-making) help.

I'm very good at taking over the entire kitchen and dining room (which are, in fairness to me, tiny) once I get going on a pickling or fermenting project. Especially when I have Elise's expert pickling (and mess-making) help.

Having tried quite a few pickle recipes, I can confidentially say that this is one of my favorites. It's sweet but not too sweet, spicy but not too spicy, and very flavorful. And, like most good classic recipes, I stole it from my mother. These pickles get crispy and delicious after a few days in the fridge, and stay good for at least three months. 

Makes about 1 quart

1 cup white vinegar
1/4 cup sugar
1 tablespoon sea salt
1/2 teaspoon freshly ground black pepper
6 whole cloves
2 bay leaves
1 teaspoon crushed red pepper flakes
1 teaspoon dill seed
4 to 5 small pickling cucumbers, peeled in stripes and sliced into 1/8-inch-thick rounds
1 small red onion, thinly sliced into rounds

1. Combine the vinegar, sugar, salt, black pepper, cloves, bay leaves, red pepper flakes, and dill seed in a quart jar. Place the lid on the jar and shake until the sugar has dissolved.

2. Layer the cucumbers and onion in the jar using a wooden spoon to press them tightly into the jar. Place the lid on the jar, shake it well, and refrigerate.

Squash Blossoms, an Italian Delicacy

Squash blossoms, an old-school Italian delicacy when breaded and fried, are the extraordinarily delicate male flowers of our summer squash crop. Each squash plant produces male and female flowers - the female flowers go on to produce squash, so we leave those on the plant, but the male flowers are just for efficient pollination. Though our plants wouldn't produce as prolifically if we picked all the male blossoms, they certainly won't miss them if we pick a few once or twice a week. 

There are some recipes floating around for stuffed squash blossoms, though they're so delicate that I've never convinced myself to try stuffing them. Instead, I prepare them as my father taught me - simply breaded and fried, with a little salt and pepper, and eaten straight out of the pan. Nothing says summer like a fried squash blossom.

6 - 8 squash blossoms
1 cup flour, seasoned with salt and pepper
2 eggs
Vegetable oil

Heat a small skillet with enough vegetable oil to be about ½ inch deep in the pan. Put the flour in one small bowl. Beat the eggs into a second small bowl. Test the temperature of the oil by sprinkling flour into the pan - if it sizzles, the oil is ready. Carefully coat each blossom in flour, then dip it in the egg, then place in the pan. Do this for each blossom, letting them fry on each side for 2 - 3 minutes, or until crisy and brown. Let drain on paper towel for a few minutes to drain excess oil, but serve immediately after, while still hot. 

Summer Squash

The thing about summer squash is that you can cook them all in the same ways, use the same techniques and recipes, and they will all taste roughly the same. I promise. 

That being said, there are some recipes that lend themselves to different varieties of summer squash. For example, recipes for stuffed squash might be most easily done using 8-ball zukes because they're big and fat. The three types of patty pans are delicious in any recipe that calls for sautéing because they're so little and tender and adorable. And the green and yellow zukes are, of course, always always always delicious on the grill. 


Zucchini Bread

This, my longtime favorite, recipe is earthy and dense and a little spicy. If you're short on time and long on zucchini, shred and freeze the zukes in 2 cup increments for winter baking. 

3 eggs
1 C olive oil
2 C zucchini, shredded
1 3/4 C sugar
2 tsp vanilla
3 C flour
3 tsp cinnamon
1/8 tsp nutmeg
1 tsp baking soda
1/2 tsp baking powder
1 tsp salt
1/2 C chopped walnuts

1. Beat eggs, mix in olive oil and sugar. Mix in vanilla and zukes.

2. Combine dry ingredients in a separate bowl, then add to the wet ingredients, mixing thoroughly.

3. Bake at 350 degrees for 35 minutes, or until a toothpick inserted into the center comes out clean. Be wary of over-baking - check the bread regularly to avoid it. It's best with gooey and moist.


Zucchine a Sorpresa (yup, Zucchini Surprise)
Adapted from The Silver Spoon

I'm not sure what about this recipe is a surprise, because you're pretty much getting out exactly what you put in, except it's gooier, hotter, and more delicious. But I certainly don't argue with the premiere encyclopedia of italian cooking, so the name stays. 

6 zucchini, slices lengthwise
1/2 C flour
2 eggs
1 1/2 C bread crumbs
1/2 tsp dried oregano
7 oz of provolone cheese
vegetable oil
salt

1. Sprinkle the zucchini slices with salt and let stand for about an hour, then pat dry with paper towels. Meanwhile, spread out the flour in another shallow dish and spread out the bread crumbs in a third.

2. Sprinkle a slice of zucchini with a little oregano, place a slice of provolone on top and cover with another slice of zucchini. Press together well, dip first in the flower, then in the beaten eggs, and finally in the bread crumbs. Make all the sandwiches in this way.

3. Heat the oil in a skillet, add the zucchini in batches, and cook until golden brown all over. Remove with a slotted spatula and drain on paper towels.